
As homebrewers, we often taste a commercial beer and think “I make this better.” If you’ve ever thought about brewing a better milk stout, you’re probably wondering where to start. Let’s walk through a milk stout recipe and learn how to brew your own milk stout!
To brew a great milk stout, you need quality chocolate malts, lactose, bittering hops for balance, a low attenuating yeast strain, and a balanced water profile. This English-style beer benefits from English ingredients. The resulting brew should be exceptionally creamy and smooth, focusing on malt sweetness and relatively low above (3-6%).
Keep reading to learn more about what makes a milk stout great, the recommended ingredients, and a recipe to get you started.
Topics We Cover
What is a Milk Stout?
A good milk stout will provide just enough sweetness without being overwhelming.
The milk stout is a deliciously sweet variation of the iconic stout. While a milk stout has many of the same characteristics as popular dry stouts like Guinness, it stands out with a mouth-coating body and sweetness that balances any bitterness.
Beers within this style will vary in sweetness depending on the brewer’s preference. In some cases, they are similar to creamed coffee. You will taste some coffee notes that are mellowed by the malt sweetness.
Oftentimes, a milk stout is a more approachable introduction to the stout family. Most milk stouts have the following characteristics:
- Color – Opaque black, 35-40 SRM
- Common flavor – Chocolate, malt sweetness, coffee
- Aroma – Roasted malt, chocolate
- Mouthfeel – Mild carbonation, very smooth and creamy
- IBUs (Bitterness) – 15-25
- ABV – 3-6%
Keep reading to find out more about this popular style of beer!

History of the Milk Stout
If you were to look at a milk stout and think, “This sounds like a slightly more healthy beer,” you would not be alone. Supposedly, when milk stouts were at the height of their popularity in the late 19th century, many physicians considered them to be a curative for various illnesses.
This was because, at the time, they were made with milk in the brewing process. Along with encouragement from brewers, the milk stout appeared to be a good source of nutrients.
Doctors would even recommend breastfeeding mothers to drink milk stouts to increase milk production. This rumor has even persisted today, but no substantial science is behind it.
While historically made with milk as an adjunct, today, milk stouts are made using lactose, the sugar in milk. The brewing techniques changed when lactose became easily produced as a by-product of whey production.
For this reason, you cannot label a stout of this style as a milk stout in England. However, the ban does not exist in any other country so the name persists. They are also known as sweet or cream stouts.
Popular commercial Milk Stouts
Try a milk stout for yourself with these popular examples.
- Left Hand Brewing Milk Stout – Often described as the flagship beer of the style, this milk stout is both a rich and smooth example of the style.
- Mast Landing Gunner’s Daughter – This peanut butter milk stout is a great dessert beer that shows off its balance between silky smooth nuttiness and roasted coffee.
- Belching Beaver Peanut Butter Milk Stout – Another flagship beer from a craft brewery, this beer will have you marveling over its peanut butter taste and aroma.
- Lakewood Brewing The Temptress Imperial Milk Stout – The Temptress invites you in with its dark chocolate roasted notes and makes you stay for the 9.1% ABV.
If you are interested in more examples, check out this list of the best milk stouts to try in 2022!
Popular Milk Stout recipe kits (all-grain or extract)
Jim was looking for a dark, smooth, creamy mouth feel stout just like an Australian stout he had tasted years ago.
Over the years, Jim found a clone that was close but needed some small changes. After many trials and test batches, he came up with this recipe that is very drinkable when it is fresh.
Recipe and Ingredients for a Milk Stout
No matter how interesting the history is, drinking beer is much more fun. But first, you have to know how to make it.
Brewing a milk stout takes around 2-4 weeks from brew day to ready to drink. It can be longer if you want to let it mature some.
Below, I will break down all of the aspects of a good cream stout, from recipe and ingredients to brewing techniques.
Quality ingredients make quality beer. More than that, you need the right ingredients for the style.
This means you need to know what ingredients work best for the style, including:
- Water profile
- Base grains
- Specialty grains or other additions
- Hops
- Yeast
Let’s explore the various ingredients that make a stout a milk stout. As with all home brewing, experiment to match your tastes.
Water profile
Water profiles can be an in-depth discussion. Not only do you need to know what to shoot for you also need to know how to get there and find out where you’re starting from.
When brewing a milk stout, you want a water profile that is balanced in minerals with a pH close to 5.2, which is on the lower end of the standard range. The chloride-to-sulfate ratio should be balanced.
This style is typically balanced when it comes to hop versus malt flavors. If anything, you would want to enhance malt flavors by tipping the scales in favor of chlorides. This should also elevate the mouthfeel of the beer.
Here is a more in-depth look at the best water profile for brewing a milk stout.
Base grains
Grains are key to developing the defining characteristics of any stout.
Good base grains for a milk stout are pale malts such as Maris Otter as a starting place. American chocolate malts are another good choice for adding color and roasted malt notes.
This style is predominately an English one, so British pale malts should make up the majority of the grain bill. Darker malts like chocolate malts can make up a good portion of the bill, but should not be the majority.
You can also use the below in addition to Maris Otter and American chocolate malts:
- Pale chocolate malts – These malts are a lighter version of American chocolate malts. They are great if you don’t want as much of a heavy malt presence.
- Dark crystal malts – These malts will provide a nice malt presence without as much bitterness that comes from roasted malts.
Specialty grains or other additions
This style can benefit from small additions of specialty grains to round out the body or flavors.
The most important addition to a milk stout is the lactose that gives the style its name. You can also achieve the characteristic sweetness with some crystal malts around 60° Lovibond.
Since brewer’s yeast cannot ferment lactose sugar, it will add sweetness and complexity to the body. You will not need much lactose. Somewhere in the range of 5-10% of the bill will serve you well. The more you add, the sweeter your beer will be.
If you choose not to use lactose, you can add crystal malts to get some sweetness. However, this will rely on the attenuation of the yeast used as I will cover later.
Other common specialty grains include:
- Flaked oats – Adding flaked oats will provide further complexity and silkiness to your beer’s mouthfeel.
- Flaked barley – This adjunct won’t add any extra sugars but will benefit head retention and body.

Hops
This style is not focused on hops, but that doesn’t mean they aren’t necessary. You want hops that will add something to the beer without detracting from the focus.
The best hops for balancing a milk stout are East Kent hops and Fuggles hops. Neither will add too much bitterness but will add complementary hop flavors. Important characteristics are low to mid bitterness and mild flavors.
As with the grains, this style works well with many English hops. That said, you can add hops from any country as long as they meet the above characteristics. You should not taste or smell much from the hops in this beer beyond a mild bitterness.
Bittering
Bittering is the more important side of hops in a milk stout.
In beers that are meant to be very bitter, you should pick hops with high alpha acid concentrations. In a milk stout, the hops are just meant to prevent the sweetness from becoming overpowering. In this case, you don’t need to look for high alpha acid concentrations.
Hops that are meant for bittering are added early in the boil. By adding them early, the hops are able to isomerize the alpha acids to add bitterness. When hops isomerize, most of the aroma and flavor are boiled off. This is why hops meant for bittering don’t need to have a certain flavor or aroma profile.
If you want to use as few hops as possible to avoid vegetal flavors, you can use small amounts of high alpha acid hops.
| Name | Purpose | Alpha Acid % |
| Willamette | Aroma | 4-6% |
| Fuggle | Bittering + Aroma | 3.5-6% |
| Magnum | Bittering | 12-14% |
| First Gold | Bittering + Aroma | 5.6-9.3% |
| Nugget | Bittering | 11-14% |
Aroma and Flavor
Since you don’t want a heavy hop aroma or flavor in a milk stout, you want to find mild hops.
These hops will be added towards the end of the boil to add their oils contributing to aroma generation. They do not generate much bittering.
This style of beer does not need any aroma or flavor hops since you can get everything you need from them as bittering hops. If you do choose to use hops in this way, be sure to pick one that has complimentary notes.
| Name | Flavor/Aroma | Alpha Acid % |
| Tettnanger | Cream, caramel, citrus, woody, floral | 2.5-5.5% |
| East Kent Golding | Earthy, honey, spice, lavender | 5-6% |
| Cascade | Citrus, floral | 4.5-7% |
Yeast
The yeast you use in a sweet stout can have a large impact on the end result.
When choosing the yeast for a milk stout, you will want an ale yeast that has a low attenuation rate, medium to high flocculation, and low ester production.
As mentioned above, your choice of yeast is also affected by the grain bill. If you don’t use lactose or another unfermentable sugar, you will want a low attenuating yeast. If you do use lactose, you can go with a strain that is a little more attenuating if it has desirable qualities.
Want to learn more? Here is further discussion on yeast strains for sweet stouts and other stouts!
Dry
Here are a few possibilities for dry yeast in a milk stout.
| Name | Attenuation | Flocculation | Temp Range |
| Safale S-04 | 74-82% | High | 59-68°F |
| Safale US-05 | 78-82% | Medium | 64.4-78.8°F |
| Nottingham | 77% | High | 50-72°F |
Liquid
If you prefer liquid yeast for your milk stout, here are a few suggestions.
| Name | Attenuation | Flocculation | Temp Range |
| Wyeast Whitbread Ale 1099 | 68-72% | Medium-High | 64-75°F |
| WLP004 | 69-74% | Medium-High | 65-68°F |
| Wyeast Irish Ale 1084 | 71-75% | Medium | 62-72°F |
How to brew Milk Stouts
Once you’ve decided what ingredients to use or recipe to follow you’re almost ready for brew day. Let’s look at what your brew day might look like as well as a few considerations.
Before you start your brew day, you need to decide your mash style, find out how much water you’ll need throughout the day, important temperature ranges, when you’re adding hops, and whether you’re using a yeast starter.
After addressing these considerations, you can get started. With all-grain brewing, you will need to start with milling your grains if that has not been done for you. Then, using the water you prepared earlier, you’ll move on to mashing in.
Next will be the saccharification rest, lautering, and sparging. Once you have enough wort, you’re ready for the boil, which is pretty standard with a milk stout. Let’s look at those main steps in some more detail.

Mashing
Today’s malts are already well-modified, so they do not require a step infusion.
Your single infusion mash should be an hour long, and the temperature should remain within the 151-154°F range.
There are several important aspects to the mash. The first is the temperature you rest at. The range listed above can result in a balanced beer.
A lower temperature range won’t convert as much starch into sugar which would make the beer dryer. A higher temperature would cause the beer to be more malt-focused.
Keep in mind that the temperature of your strike water will go down when added to the grains. The size of the temperature drop will depend on your setup and environment.
As for the amount of water needed, you will want about 1 quart of water per pound of grain.
Boil
When your wort is ready, you’ll need to boil and add your hops at specific times.
When boiling wort for a milk stout, you should boil it for at least an hour. Your bittering hops should be added in the beginning or at the latest 10 minutes into the boil. Any aroma hops you chose should be added around 10 or 15 minutes before the end.
An hour is the minimum boil duration for a milk stout. However, it can benefit from more. Up to an hour-and-a-half boil would do well for a sweet stout. A longer boil will take advantage of the Maillard reaction to darken the beer and add some flavor notes.
The hop addition times are dependent on how much you want to extract from the hops. The earlier you add them, the more bitterness and the less aroma you will get.
Whirlpool or flameout
While you can add your hops during the boil, you can also add them during whirlpool or flameout. These two methods both take place directly after the boil but are slightly different.
Both whirlpool and flameout are designed to extract flavor and aroma from hops without much, if any, bittering.
The biggest difference is whether you just add the hops to the cooling wort or whirlpool the wort. With flameout, you simply remove the wort from the heat and add the hops. The other method involves creating a whirlpool in the wort to collect trub while the hops soak.
Neither method is especially helpful for a sweet stout due to its lack of focus on hops.
Fermenting Milk Stouts
Your milk stout fermentation will be fairly standard.
When letting your milk stout ferment, be sure to keep it in the ideal temperature range for your yeast strain. It should take a week (two at the most) for fermentation to finish.
You won’t need a secondary fermentation since you won’t be dry hopping. That said, if you would like to let your beer mature, you could do so in a secondary fermentor.
Temperatures
The temperature your yeast needs is the most important factor.
The ideal temperature range for milk stout fermentation is between 60 and 70°F. Higher temperatures can produce unwanted by-products, while lower temps can slow fermentation.
Whatever your ideal temperature range is try to keep it consistent. Temperature control is one of the best ways to create quality beer.
Bottling or kegging Milk Stouts
The best packaging for a milk stout is a keg with a nitrogen system. The nitrogen will boost the inherent creaminess and elevate your stout.
Both kegging and bottling will allow you to enjoy your milk stout if you don’t have a nitro system.
Milk Stout recipes
As you know now, a milk stout is a relatively simple beer to homebrew.
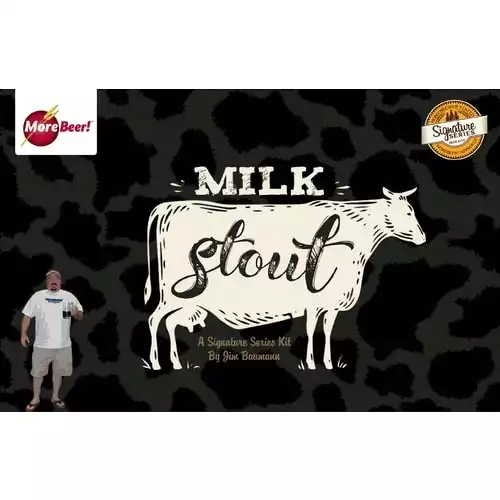
Here is a great all-grain stout recipe from MoreBeer. This is a great first brew (and the kit provides almost everything you’ll need).
Ingredients
- 8 lbs 2-Row Malt
- 12 oz Crystal Malt 75°L
- 1 lb Black Patent
- 2 oz Cascade Hops
- 1 lb Lactose
- Clarifier
- Yeast (such as WLP002, Wyeast 1968, Imperial A09, S-04, or Omega OYL006)
Method
- Set up all-grain brewing equipment.
- Heat 2.75 gallons of water to 153°F.
- Slowly add the 2-Row and Crystal malts to the heated water in the mash/lauter tun. Stir while adding.
- Mash at 153°F for 60 minutes.
- After the mash, recirculate the wort until the runoff is mostly clear.
- Sparge with 170°F water for 45-60 minutes. Collect 6-7 gallons for the boil.
- Begin the 60-minute boil. Add the 2 oz of Cascade hops.
- At 5 minutes left on the boil, add the clarifier.
- Cool the wort to pitching temperatures for chosen strain.
- Pitch yeast.
- Ferment at 68°F for at least one week.
- Allow one week for settling.
- Bottle or keg as desired.
- Carbonate your beer.
- If bottling, prime your beer for bottle conditioning. Carbonation can take 2 weeks.
- If kegging, force carbonate.
- Once carbonation is done, enjoy your beer!
Did you know that we have a full library of homebrew beer recipes for every style?